The adage ‘one man’s trash is another man’s treasure’ is exactly the sentiment behind the art of upcycling.
Doing more with old belongings, upcycling is a sustainable way to flex your creative muscles and save money while doing it. As Money for Nothing‘s Sarah Moore has taught us, upcycling also offers a great opportunity to take something from the scrap heap straight to your front room.
So, you want to try upcycling for yourself? Get your arts and crafts supplies at the ready – below are our favourite upcycling projects you’ll be eager to show off.
Bookcase makeover
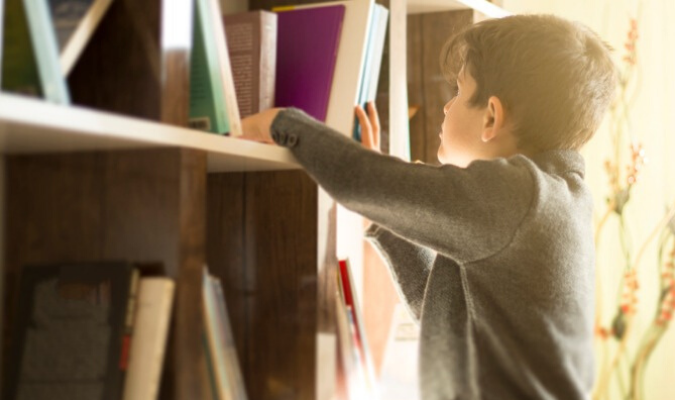
Are your bookcases looking a little drab and lifeless? Don’t worry, with some intricate cutting and sticking, you can spice up your personal library. Just pick out vibrant wallpaper, stick it to the back panel of the bookcase and you’ve got a fantastical setting worthy of your novel collection.
What you need:
- Old bookcase
- Tape measure
- Scissors
- High tack spray adhesive
- Wallpaper
How to do it:
- Start by taking out any removable shelves, then measure the height and width of the back of the bookcase. If the bookcase has permanent shelves, individually measure each section at the back.
- Cut your wallpaper exactly to fit the measured section at the back, using individual pieces for permanent shelves. Make sure the newly cut wallpaper fits by laying it against the back of the bookcase without adhesive, trimming where necessary.
- Put the wallpaper aside and spray the back of the bookcase with adhesive. Then, by matching the corners of the paper to the corners of the bookcase’s back, stick the wallpaper down. If cut into individual pieces, complete this section by section.
- Smooth it down with your hands, working out the bubbles before the adhesive sets. Replace the removable shelves and there you have it – your bookcase has a brand-new look!
The organised toy box
If you’ve ever felt the pain of treading on a stray LEGO block, then you know the importance of keeping your children’s toys in check. The problem is finding somewhere to put them all. That’s where this easy upcycled furniture hack can help.
What you need:
- Metal filing cabinet
- Tape measure
- Large piece of plywood
- Circular saw
- Four screws
- Power drill
- Primer
- Tin of paint (suitable for indoor use)
- Paintbrush and roller
How to do it:
- Remove the filing cabinet’s drawers – they won’t be needed. You should be left with the drawer sliders still attached to the inside of the cabinet.
- Next, you need to build the dividers that separate the compartments. For this, measure the width and depth of the cabinet. Then, cut the plywood into separate pieces according to these measurements – one for each set of parallel drawer sliders and one for the bottom of the cabinet.
- To cover the hole at the bottom of the cabinet, attach the wood by holding the piece in place and drilling the screws into each corner. The rest of the pieces can be simply slotted into the drawer sliders.
- Now it’s time for a lick of paint. Prepare the cabinet with primer and then apply two coats of paint with a roller. You can then fill in the smaller areas with a paint brush.
- Flip the cabinet on its back with the compartments facing up. Et voila! Stray toys around the house finally have a stylish new home.
Drawer side table
Whether repurposed from a dominating dresser or a teeny-tiny nightstand, drawers can do so much more than just organise your underwear. With little more than a lick of paint and a set of furniture legs, you can transform your discarded drawers into a stylish set of upcycled furniture.
What you need:
- Drawers
- Sandpaper
- Tin of paint
- Four small furniture legs (with attached screws)
- Tape measure
- Large piece of plywood
- Power drill
- Pencil
- Four T-nuts
- Spirit level
- Four shelf supports
How to do it:
- Start by sliding out the drawers. Then, sand each drawer down individually and paint with your chosen colours. You should also take this opportunity to paint your furniture legs.
- Next, measure the depth and width of the inside of the drawer. Then, use these measurements to cut the large piece of plywood into a shelf using your power drill. The shelves need to be exact, otherwise they won’t fit snugly inside.
- Sand and paint your newly cut shelf – leaving to dry completely – before slotting into your side table.
- On the bottom of the drawer, pencil each corner where you want to attach the furniture legs. Drill through these points and push each of the T-nuts into place. Then, you can simply screw the furniture legs onto the drawer.
- Inside your drawer, mark the four points where you want to put the shelf, using a spirit level for reference. Drill a small incision into these pencilled points – but be careful only to drill halfway through the wood, otherwise your shelf supports will be unstable.
- Slot the shelf supports into each of the four holes. Now you can slide your shelf into place!
DIY crate storage
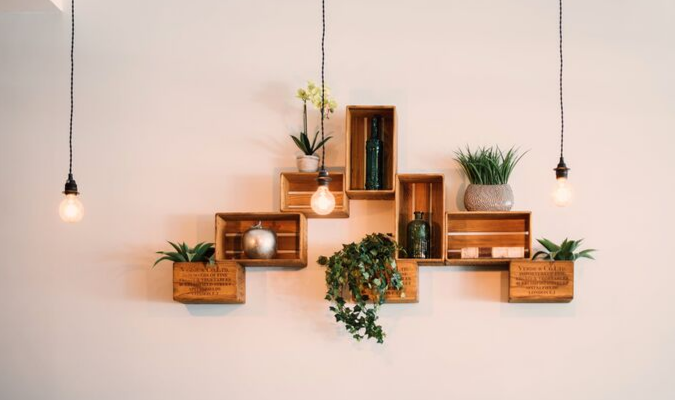
Tired of fighting the crowds in IKEA for that fetching Formica table? We’ve got you covered. With a touch of creativity and a little bit of know-how, you can transform an unassuming wooden crate into a stylish shelving unit that looks great in any room.
What you need:
- A wooden crate
- Sandpaper (a medium coarse paper to remove any paint or varnish and a fine paper for smoothing the surface)
- L-brackets (you might also hear these called ‘angle brackets’)
- Paint or wood stain
- Screws
- Power drill
How to create storage shelves:
1) To get started, hold your sandpaper flat and rub it over the exterior of your crate until it is smooth all over, taking special care on the corners. For best results, rub against the grain of the wood.
2) When the wood is nice and smooth you can give your crate a makeover, either with paint or a wood stain of your choice. If you like the original rustic style, skip this step but you might want to add a gloss to give it a lacquered look.
3) Now you can move on the more technical bit: the assembling. Use a power drill to screw the L-bracket to the spot on the wall where you plan to put the shelves. You also might want to use a spirit level to make sure everything is lined up correctly.
4) Then, attach the bottom of the crate to the L-bracket. Hey presto, you have a brand-new set of shelves!
Upcycled TV unit
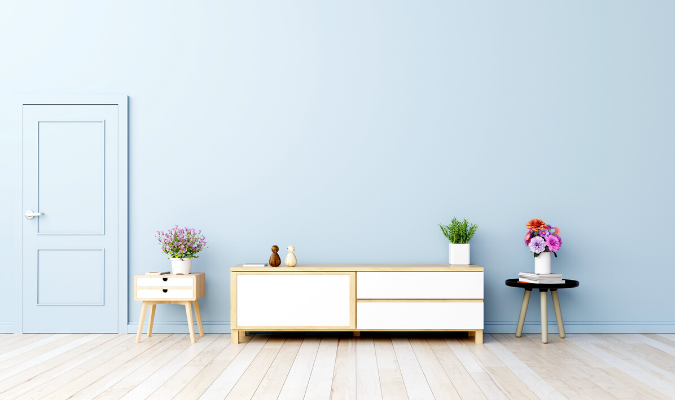
After years of faithful service, your TV unit might have lost some of the shine that initially caught your eye. However, that doesn’t mean you need to flick through the Argos catalogue for a new one – you can give your TV unit a new lease of life with just a few simple steps.
What you need:
- TV unit
- Screwdriver
- Sandpaper/primer
- Tin of paint
- Paintbrush
- Varnish
How to do it:
- To begin, remove any drawers or doors attached to the TV unit, using a screwdriver for the fiddly bits. This helps you to clearly see which components need replacing or upcycling.
- The next step is to prepare your TV unit for its glow up. This means sanding down the structure if it’s wood or layering it with primer if it’s metal. Give the same treatment to removed components as well.
- Grab your brush and don your overalls because it’s time to paint. Three coats should do the trick, taking care to keep your strokes even. Or, if you’re happy with your current colour scheme, you can treat your wooden TV unit with a coat of varnish for that brand-new shine.
- Reattach the drawers and doors that you previously removed and, just like that, you have a striking new centrepiece for your living room.
At Plumbs, we are huge advocates of the upcycling movement. Our reupholstery service gives old furniture a new lease of life, removing the need to buy a whole new sofa suite. For more information about how Plumbs can upcycle your furniture, visit our website.